はじめに
Express で Twitter や Google の API を使った web アプリを作りたいと思い、
Node.js 用のそのような認証・認可のためのライブラリを探したところ Passport.js というのが有名そうだとわかりました。
既に日本語でも多くの記事があるものの、チュートリアルのような段階的に作り上げていく手順としてまとまったドキュメントがなくて最初戸惑ってしまったので
実装の手順をメモしておきます。
なお、今回は連携先に Google を選びました。
※OAuth に対して「認証」という言葉を使うのは適切でなく「認可」と呼ぶべきなのかもしれませんが、(自分自身理解しきれていないこともあり)ここでは特に区別せず「認証」という言葉を使っています。
リポジトリ
参考にしたリポジトリ
Node.js を使用したユーザーの認証 | Node.js | Google Cloud Platform
GCP の Node.js チュートリアルで Passport.js を使用した認証についても触れており、こちらが非常に分かりやすかったです。
リポジトリはこちら。
https://github.com/GoogleCloudPlatform/nodejs-getting-started
手順
Google Cloud Console でプロジェクトを作成し、client id と client secret を発行する
https://console.cloud.google.com
にアクセスして新規プロジェクトを作成し、[API とサービス] > [認証情報] から新規 OAuth 2.0 クライアント ID を作成します。
こちらの公式ドキュメントを参考にすると良いと思います。
OAuth 2.0 の設定 - Cloud Platform Console ヘルプ
アプリケーションの種類は「その他」で問題ありませんでした。
Google+ API を有効化しておく必要があるので注意。
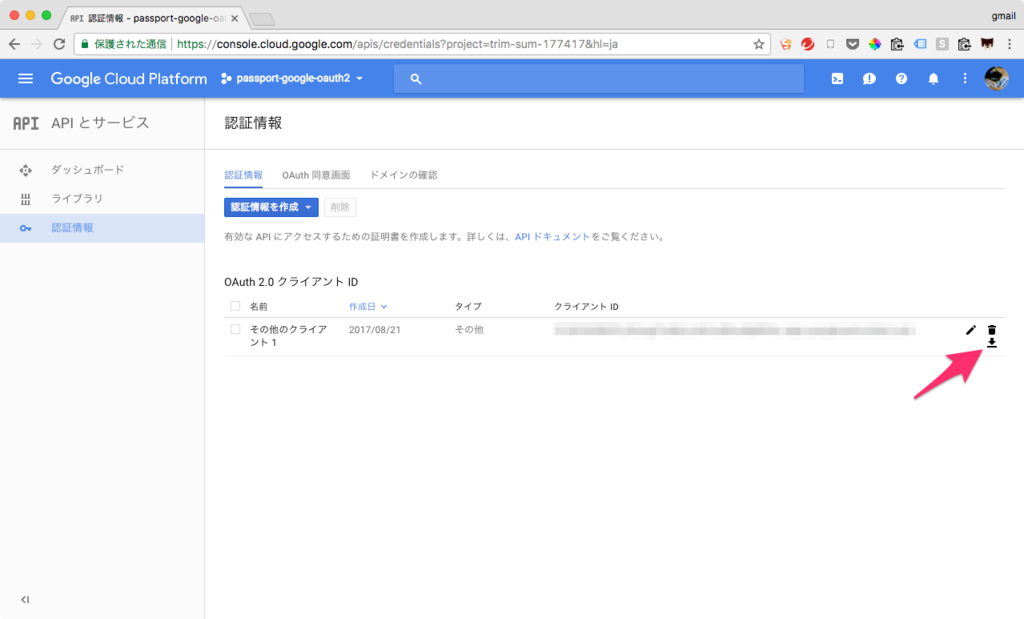
最後に表示されるダイアログの クライアント ID と クライアントシークレット を控えておきます。
またはダイアログを閉じた後も、クライアント ID 一覧の右のダウンロードアイコンからダウンロードできます。
Express アプリケーションのひな形作成
express-generator で作成したものでも何でもいいです。自分は webpack-dev-server を組み込んだテンプレート を用意していたのでそれを使いました。
Passport.js のインストール
$ yarn add passport passport-google-oauth20
で Passport.js 本体と、Google と連携するための Strategy をインストールします。
Passport.js の構成として、本体の他に連携サービスごとにライブラリが用意されており(Strategy と呼ぶ)、必要なものを追加でインストールします。
passport-google-oauth と passport-google-oauth20 があるが、前者は OAuth 1.0 用の Strategy と OAuth 2.0 用の Strategy の両方が使えるものっぽいです(未確認)。
セットアップ
初期化処理などを書いていきます。まず、エントリーポイントとなる app.js は以下のようになります。
(babel-node を使っているため ES Modules 形式になっています)
// app.js
import express from 'express';
import path from 'path';
import passport from 'passport';

import auth from './routes/auth';

const app = express();
const port = process.env.PORT || 8080;

app.use(passport.initialize());

// Routing
app.use('/auth', auth);

// Serve static files
app.use(express.static(path.join(__dirname, 'public')));

app.listen(port, (err) => {
  if (err) {
    console.error(err);
  } else {
    console.info(`==> 🌎  Listening on port ${port}. Open up http://localhost:${port}/ in your browser.`);
  }
});
Passport の初期化として app.use(passport.initialize()); を追加したぐらいでしょうか。
また、ログインやコールバックなどの URL は /auth という URL 以下にまとめるようにしました。
routes/auth.js の中身は以下です。
// routes/auth.js
import express from 'express';

// [START setup]
import passport from 'passport';
import passportGoogleOauth2 from 'passport-google-oauth20';

const GoogleStrategy = passportGoogleOauth2.Strategy;

function extractProfile(profile) {
  let imageUrl = '';
  if (profile.photos && profile.photos.length) {
    imageUrl = profile.photos[0].value;
  }
  return {
    id: profile.id,
    displayName: profile.displayName,
    image: imageUrl,
  };
}

// Configure the Google strategy for use by Passport.js.
//
// OAuth 2-based strategies require a `verify` function which receives the
// credential (`accessToken`) for accessing the Google API on the user's behalf,
// along with the user's profile. The function must invoke `cb` with a user
// object, which will be set at `req.user` in route handlers after
// authentication.
passport.use(new GoogleStrategy({
  clientID: process.env.CLIENT_ID,
  clientSecret: process.env.CLIENT_SECRET,
  // FIXME: Enable to switch local & production environment.
  callbackURL: 'http://localhost:8080/auth/google/callback',
  accessType: 'offline',
}, (accessToken, refreshToken, profile, cb) => {
  // Extract the minimal profile information we need from the profile object
  // provided by Google
  cb(null, extractProfile(profile));
}));

// TODO: ルーティング
GoogleStrategy というオブジェクトに先ほどの client id や client secret を渡して初期化しています。
今回、これらの情報は .env に記述し、node-foreman などを使って起動時に読み込む想定でこのような書き方になっています。
また、 extractProfile() は参考リポジトリのコードをそのまま利用しました。
認証が完了した後のレスポンスとして渡されてくる 生の (→ 正確にはレスポンスを このあたり で一度加工してるぽい)をこの関数で加工して、アプリで使う認証済みユーザー情報としている。profile
ログイン処理を実装する
Google の認証画面に遷移するための URL を定義します。先ほどの routes/auth.js の下に追記します。
// routes/auth.js
const router = express.Router();

router.get('/login',
  passport.authenticate('google', { scope: ['email', 'profile'] }),
);

export default router;
基本的にはこれだけ。
この状態で http://localhost:8080/auth/login にアクセスすると Google の認証画面にリダイレクトされます。
ただしコールバック URL /auth/google/callback に対応するミドルウェアを定義していないので、このままでは認証を許可してアプリに戻ってきたときにエラーになります。
リダイレクト処理を実装する
routes/auth.js にもう1つミドルウェアを追加します。
router.get(
  // OAuth 2 callback url. Use this url to configure your OAuth client in the
  // Google Developers console
  '/google/callback',

  // Finish OAuth 2 flow using Passport.js
  passport.authenticate('google'),

  // Redirect back to the original page, if any
  (req, res) => {
    console.log('Succssfully logged in:', req.user);
    const redirect = req.session.oauth2return || '/';
    delete req.session.oauth2return;
    res.redirect(redirect);
  },
);
passport.authenticate('google') をもう1回呼び出して OAuth2 のフローを完了させた後、認証後の処理としてはとりあえずログを出力して / にリダイレクトするだけとしています。
もう一度 /auth/login にアクセスすると、今度は
Succssfully logged in: { id: '112....5846',
  displayName: 'Shingo Yamazaki',
  image: 'https://lh6.googleusercontent.com/-jwkJLL4wE/AAAAAAAAAAI/AAAAAAAAACI/1MbHlZlCL5w/photo.jpg?sz=50' }
のようなログが出力されます。というわけで認証したユーザー情報は req.user で取得できることがわかります。
またこの値は先ほどの extractProfile() で処理した結果になっています。
まとめと TODO
というわけでまずは Passport.js を使った基本的な OAuth2 のフローの実装方法がわかりました。
が、今のままでは認証したユーザー情報を持ち回ることができていないので、次回はこの情報をセッションに保存する方法について調べます。
実際に書いてみてわかりましたが、連携するサービスを変えたい場合はほとんど Strategy の差し替えだけで済みそうで非常に便利。
(追記)
続編書きました。
トラブルシューティング
/auth/login にアクセスして認証した後、
Error
    at /Users/yamazaki/workspace/node_modules/passport-google-oauth20/lib/strategy.js:95:21
    at passBackControl (/Users/yamazaki/workspace/node_modules/oauth/lib/oauth2.js:132:9)
    at IncomingMessage.<anonymous> (/Users/yamazaki/workspace/node_modules/oauth/lib/oauth2.js:157:7)
    at emitNone (events.js:91:20)
    at IncomingMessage.emit (events.js:188:7)
    at endReadableNT (_stream_readable.js:975:12)
    at _combinedTickCallback (internal/process/next_tick.js:80:11)
    at process._tickDomainCallback (internal/process/next_tick.js:128:9)